WebVTT (Web Video Text Tracks) files are a crucial tool for making video content accessible and engaging. Whether you’re adding subtitles for viewers with hearing impairments, providing translations for international audiences, or enhancing your videos with captions, WebVTT files are the standard format for displaying timed text alongside your videos. Let’s delve into what WebVTT files are and how to create a WebVTT file.
What is a WebVTT File?
A WebVTT file is a simple text file, specifically formatted to contain subtitles, captions, descriptions, chapters, or metadata for a video. When you create a WebVTT file, you’re essentially syncing text cues with specific timestamps in the video, ensuring the right text appears at the right time. This technology is essential for accessibility, enabling people to consume video content even if they have difficulty hearing the audio.
Components of a WebVTT File

When you create a WebVTT file, you’ll be working with the following components:
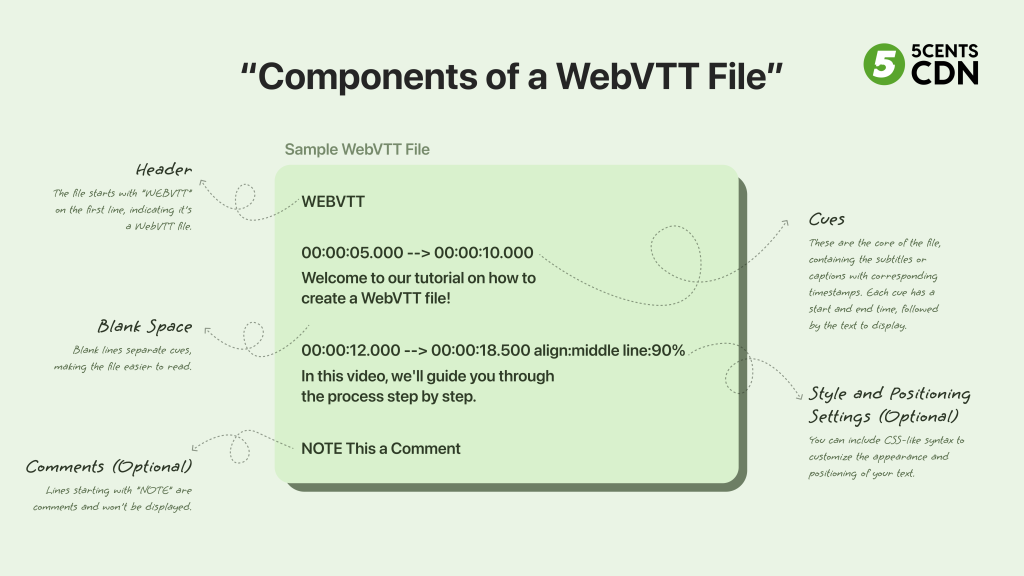
- Header: The file starts with “WEBVTT” on the first line, indicating it’s a WebVTT file.
- Cues: These are the core of the file, containing the subtitles or captions with corresponding timestamps. Each cue has a start and end time, followed by the text to display.
- Blank Space: Blank lines separate cues, making the file easier to read.
- Comments (Optional): Lines starting with “NOTE” are comments and won’t be displayed.
- Style and Positioning Settings (Optional): You can include CSS-like syntax to customize the appearance and positioning of your text.
- Metadata Headers (Optional): Additional information like language or title can be included.
How to Create a WebVTT File in Windows and Mac

How to Create a WebVTT File in Mac
If you’re a Mac user and want to know how to create a WebVTT file, follow these simple steps:
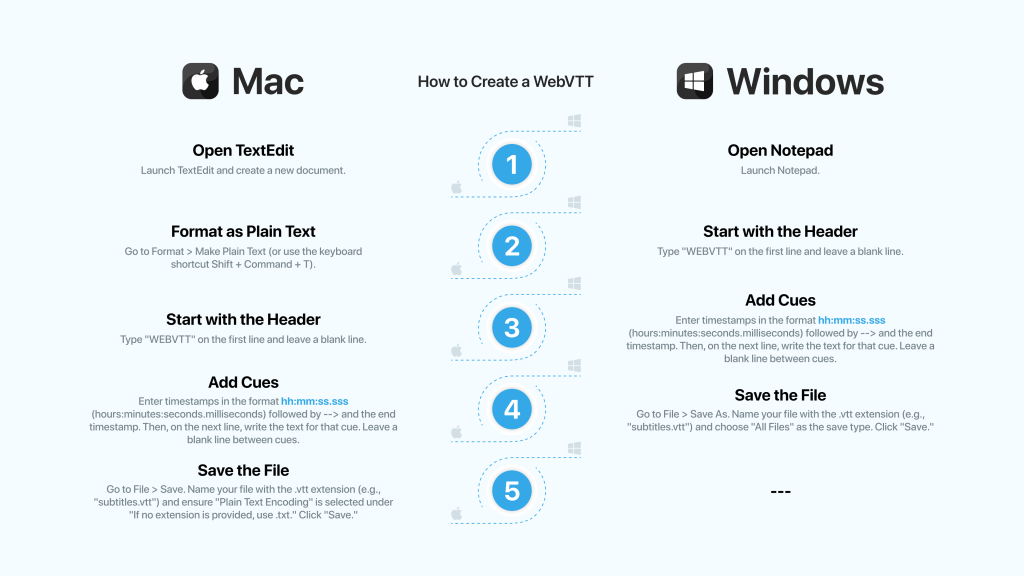
- Open TextEdit: Launch TextEdit and create a new document.
- Format as Plain Text: Go to Format > Make Plain Text (or use the keyboard shortcut Shift + Command + T).
- Start with the Header: Type “WEBVTT” on the first line and leave a blank line.
- Add Cues: Enter timestamps in the format hh:mm:ss.sss (hours:minutes:seconds.milliseconds) followed by –> and the end timestamp. Then, on the next line, write the text for that cue. Leave a blank line between cues.
- Save the File: Go to File > Save. Name your file with the .vtt extension (e.g., “subtitles.vtt”) and ensure “Plain Text Encoding” is selected under “If no extension is provided, use .txt.” Click “Save.”
How to Create a WebVTT File in Windows
Creating a WebVTT file on Windows is just as easy:
- Open Notepad: Launch Notepad.
- Start with the Header: Type “WEBVTT” on the first line and leave a blank line.
- Add Cues: Enter timestamps in the format hh:mm:ss.sss (hours:minutes:seconds.milliseconds) followed by –> and the end timestamp. Then, on the next line, write the text for that cue. Leave a blank line between cues.
- Save the File: Go to File > Save As. Name your file with the .vtt extension (e.g., “subtitles.vtt”) and choose “All Files” as the save type. Click “Save.”
How to Associate WebVTT File with Your Video
Once you’ve mastered how to create a WebVTT file, the final step is to associate it with your video:
- Upload your video and WebVTT file to your video hosting platform (e.g., YouTube, Vimeo).
- Most platforms have specific instructions on how to link the WebVTT file to your video.
Tips to Remember When Creating a WebVTT File:

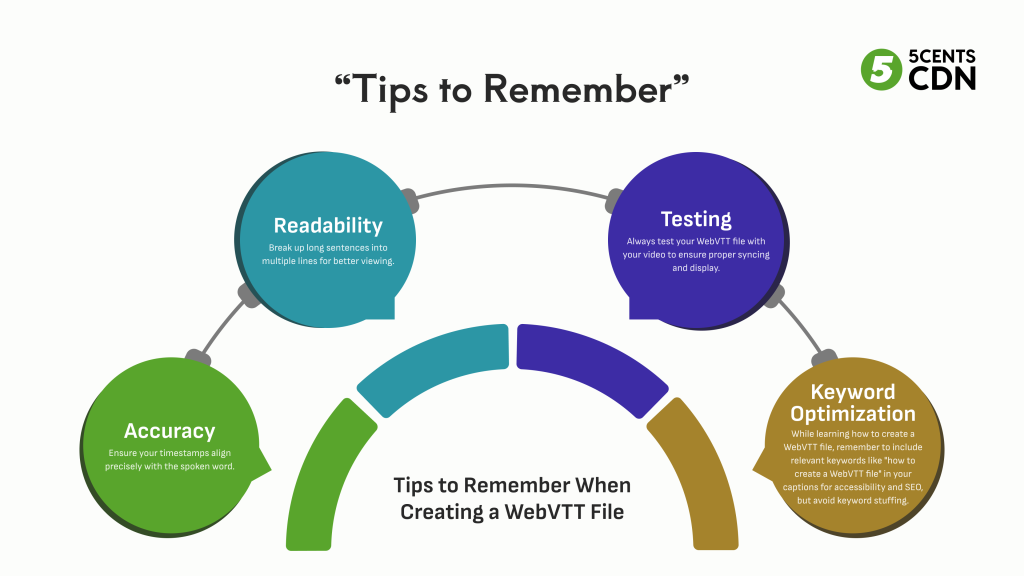
Accuracy: Ensure your timestamps align precisely with the spoken word.
Readability: Break up long sentences into multiple lines for better viewing.
Keyword Optimization: While learning how to create a WebVTT file, remember to include relevant keywords like “how to create a WebVTT file” in your captions for accessibility and SEO, but avoid keyword stuffing.
Testing: Always test your WebVTT file with your video to ensure proper syncing and display.
A Brief History of WebVTT
The WebVTT format was initially proposed by the Web Hypertext Application Technology Working Group (WHATWG) in 2010. It quickly gained popularity due to its simplicity and versatility for creating WebVTT files. In 2014, it became an official recommendation of the World Wide Web Consortium (W3C), solidifying its role as the standard for web video text tracks.
Conclusion:
Creating WebVTT files might seem like a small detail, but it has a significant impact on the accessibility and reach of your video content. By mastering how to create a WebVTT file, you’re not only improving the viewer experience but also boosting your video’s SEO. So, fire up that text editor, follow these steps, and start adding captions to your videos today. It’s a simple change that can make a world of difference.