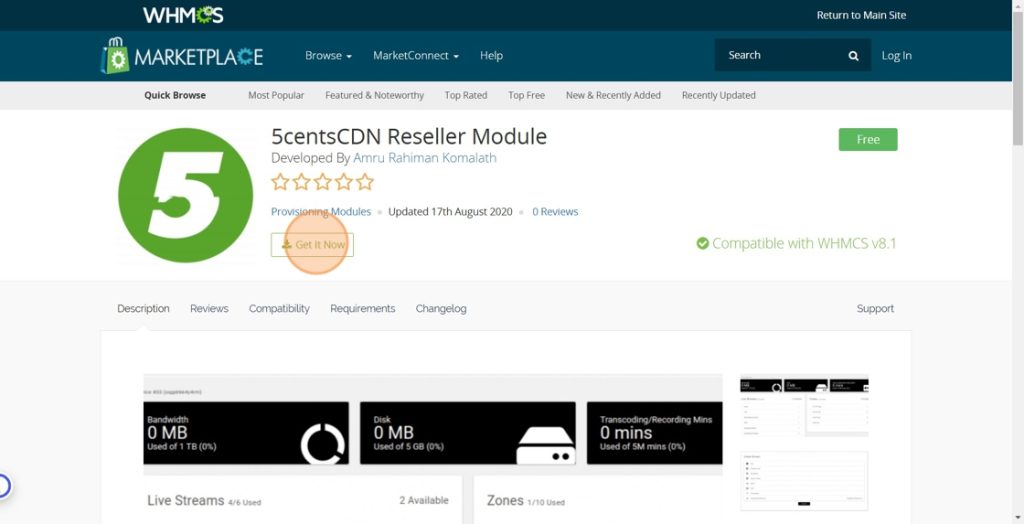
Installing our WHMCS module is a rather simple process, simply download the latest version of the module, extract it in your WHMCS install directory, then move the files to the modules and includes directories. This can be done via SSH, FTP, or even the cPanel File Manager! Here we’ll use the cPanel File Manager method, however, you can use any method you’d like.
Our WHMCS module can directly be downloaded from the WHMCS marketplace. Click here to download WHMCS 5centsCDN Reseller Module!

How to install 5centsCDN Reseller Module to WHMCS ?
- Click on Get It Now button shown in the above image.
- When you click the button a cdnresellermodule.zip file will be downloaded.
- Here we are using cPanel File Manager to install 5centsCDN reseller module
cPanel File Manager
- Login to your cPanel account, most often located at: https://$IP_or_Domain:2083/.
Note: You will need to replace $IP_or_Domain with the actual IP Address or Domain name.
- Open the File Manager. Once logged into cPanel you should see the File Manager item at the very top, listed under the “files” section. Click this icon to open.

Once you open the File Manager you will be placed in your home directory. First, you would want to do is to navigate the “public_html” directory. You will be able to do this by double-clicking on the folder icon, or by typing out the path in the box on the left-hand side.
- Navigate to your WHMCS folder. Depending on how you installed WHMCS, you may have WHMCS installed directly under public_html, or it may be in a sub-directory under public_html.
- Upload the WHMCS Module Zip file.
- Once in the WHMCS directory, click the Upload button and upload the WHMCS Module. This file should be called “cdnresellermodule.zip”.

2. After clicking upload you will land on a page that allows you to either select the file or drag and drop it onto the page.

3. Once the upload is complete, go back to the file manager and you should now see the new zip file.
- Extract the Zip file’s contents.
- In the File Manager list, locate the file and then right-click on it and select the “Extract” option.

2. We need to extract the file through this path public_html/modules/servers. Click on “Extract File(s)”.

- Verify the extracted files are there. You should now see a new directory called “cdnresellermodule”. Double-click on this new directory to open it.
Verify that you see a dashboard and templates folder along with some other files.
- That’s it! You’re all done installing the module, now just set up your first products.
The root directory should be writable by web-server. Please add the code below to configuration.php
$smarty_security_policy = [
    'system' => [
        'enabled_special_smarty_vars' => [
            'cookies', 'session', 'server', 'get', 'post', 'env', 'request', 'foreach', 'section'
        ],
    ],
];
Pingback: ไฮเบย์
Pingback: คาสิโนออนไลน์ sagame
Pingback: ออกแบบตกแต่งภายในบ้าน