The Video Manager enables you to upload videos to the cloud and schedule them into playlists, which can be embedded on clients’ websites. Audience can then watch the videos directly from these embedded playlists.
We’re thrilled to introduce Video Manager V2.0, packed with powerful new features and enhanced capabilities designed to elevate your Playlist Management experience. Here’s a look at what’s new:
- Manual Playlist
- Dynamic Playlist
- Thumbnail / Poster
- Title Overlay
- Start Time
- Thumbnail over Progressbar
- Add Chapters to the video
- Caption / Subtitle
- Playlist Analytics
- Security Settings
Here’s how to create a Video Manager project.
- Login to the 5centsCDN control panel.
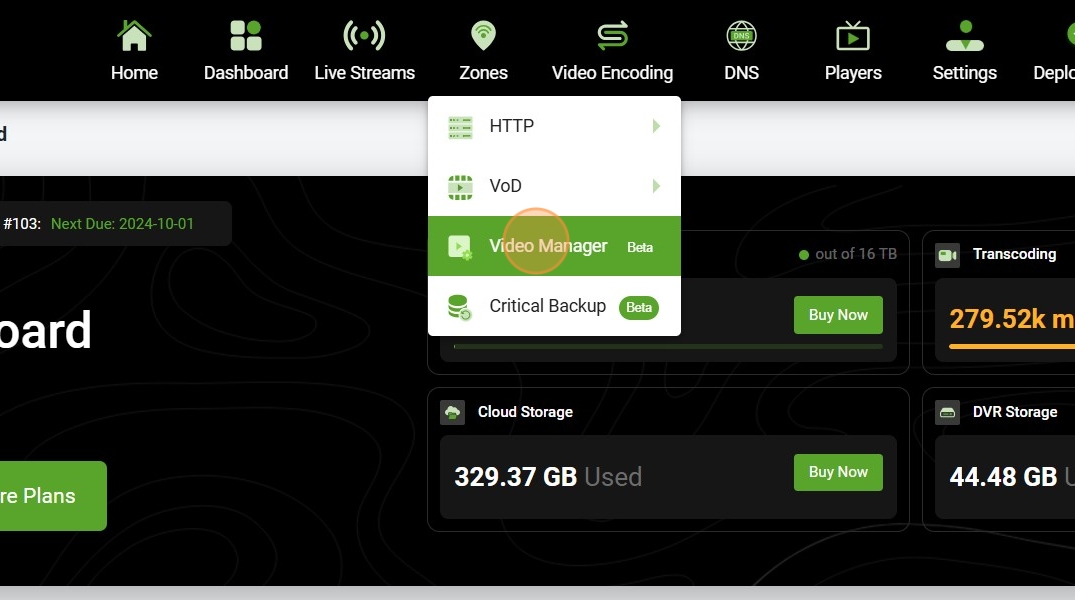
- Go to Zones and select Video Manager.
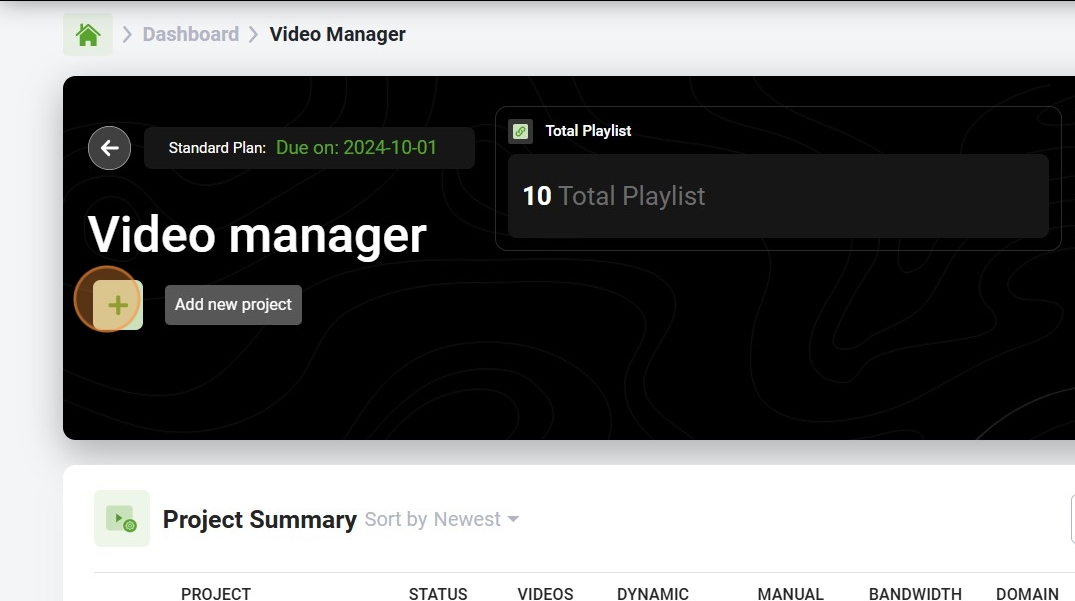
- Click the green plus button to create a new Project.
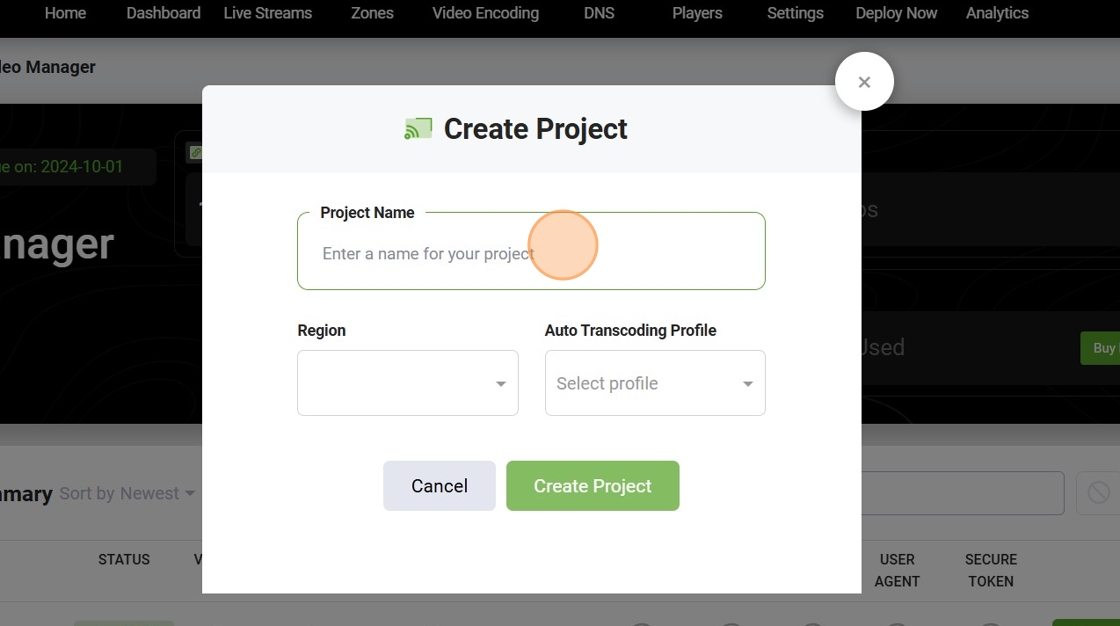
Project Name: Enter a project name.
Region: Select your nearest region(NA, EU, or ASIA)
Auto Transcoding Profile: Select the auto-transcoding profile from the list. Click here to create and set up a new auto-transcoding profile
- Click the CREATE button.
- Success! A project is created and you will be redirected to the videos section inside the project.
STEP 1: Upload files to the Video Manager
- Click on Upload Video Button
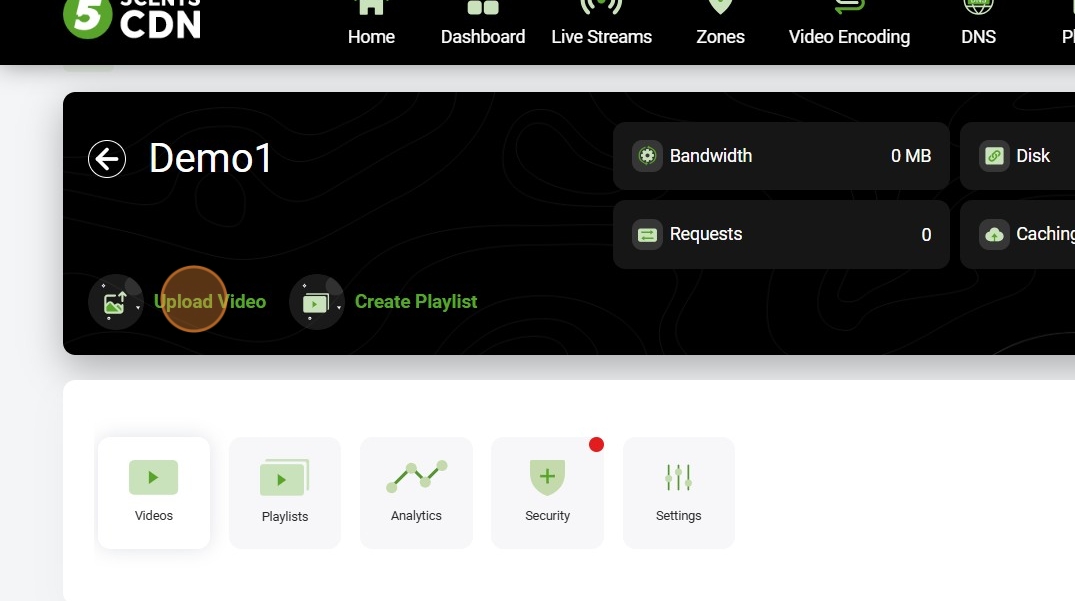
- You can select the file from your system or drag and drop the file.
- Once the files are uploaded, they will transcode automatically.
- After transcoding, the files will be listed in the VIDEOS section.
STEP 2: Working with Video Metadata
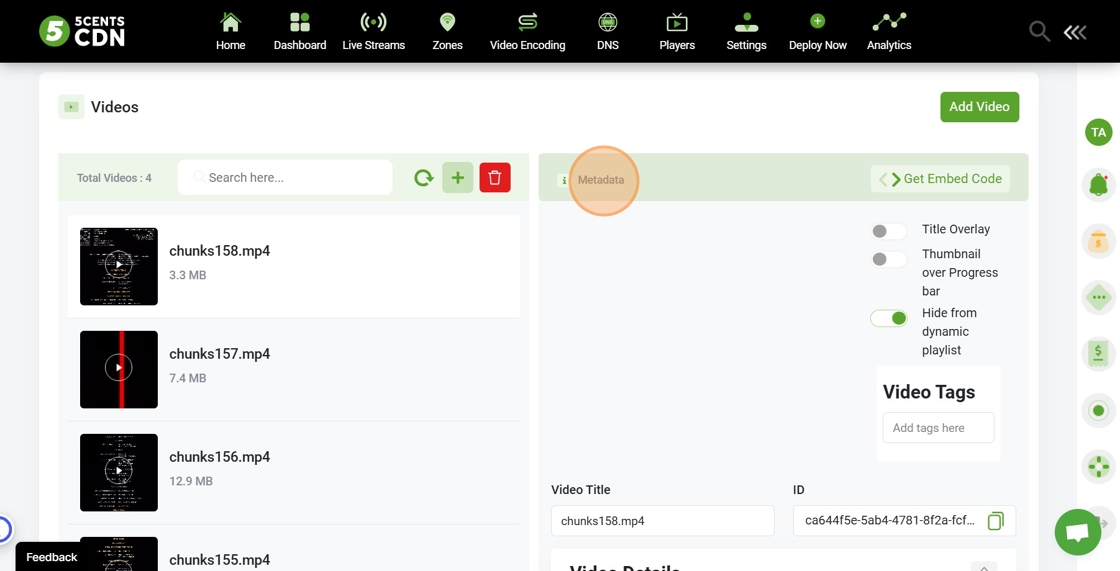
Metadata includes additional information about your video that puts the actual video file into context and enhances its presentation. It includes, among other things, title, description, etc.
- Go to the VIDEOS section.
- Click the video file that you want to update the metadata.
- Edit the Metadata fields present on the right side.
- Click the Save button to reflect the changes.
The metadata fields are listed here:
- Video ID: A unique identifier for the video on the platform. Used to identify the source.
- Title: The main headline of the video.
- Enable Title Overlay: Displays the title over the video. Learn more
- Title Overlay Link: Adds a clickable link to the title, redirecting users to a specific URL.
- Thumbnail Over Progress Bar: Displays the video thumbnail over the progress bar.
- Description: A brief summary that appears below the title on the video.
- Category: Assign the video to a specific category (e.g., Entertainment, Sports Channel). Learn more
- Tags: Descriptive keywords for the video (e.g., Season 1, Episode 2). Multiple tags can be added. Learn more
- Hide Video from Dynamic Playlist: Enable this option to exclude the video from the dynamic playlist. Learn more
STEP 3: Customize the Video file
In this step, you can personalize your video by adding a custom thumbnail, uploading subtitles, and organizing content into chapters. Follow the below steps:
- Go to the VIDEOS section.
- Click the video file that you want to Customize.
- Configure the Customize fields present on the right side [Below the Metadata field]
- Click the Save button to reflect the changes.
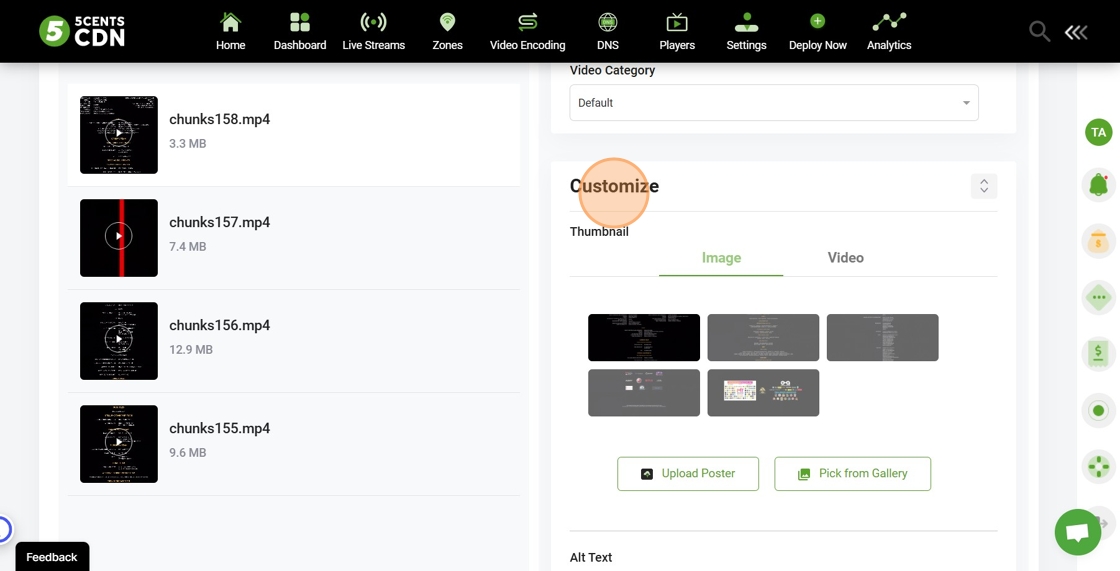
You can configure the following options under the Customize field:
- Thumbnail: Select the desired thumbnail for the video.
Image: Choose from the available options or upload a new image.
Video: Enable this option and define the start and end times for a video thumbnail.
- Chapter: Click “+ADD CHAPTER” to set the start time and provide a Chapter Title.
- CC/Subtitle: Upload subtitle files and select the desired language. Multiple files can be added. Read blog on ‘How to create a WebVTT file’
- Start Time: Simply specify your desired starting point, and the video will instantly begin playback from that exact moment.
STEP 4: Playlist Configuration
Playlists enable you to group videos that play sequentially in the player. You can create manual playlists where you add and arrange the videos exactly as you want them or dynamic playlists where the videos in the list and their order is updated automatically and continuously based on a set of rules that you specify.
- Go the the ‘Playlists’ Tab
- Click on the ‘+’ Icon to create a new playlist
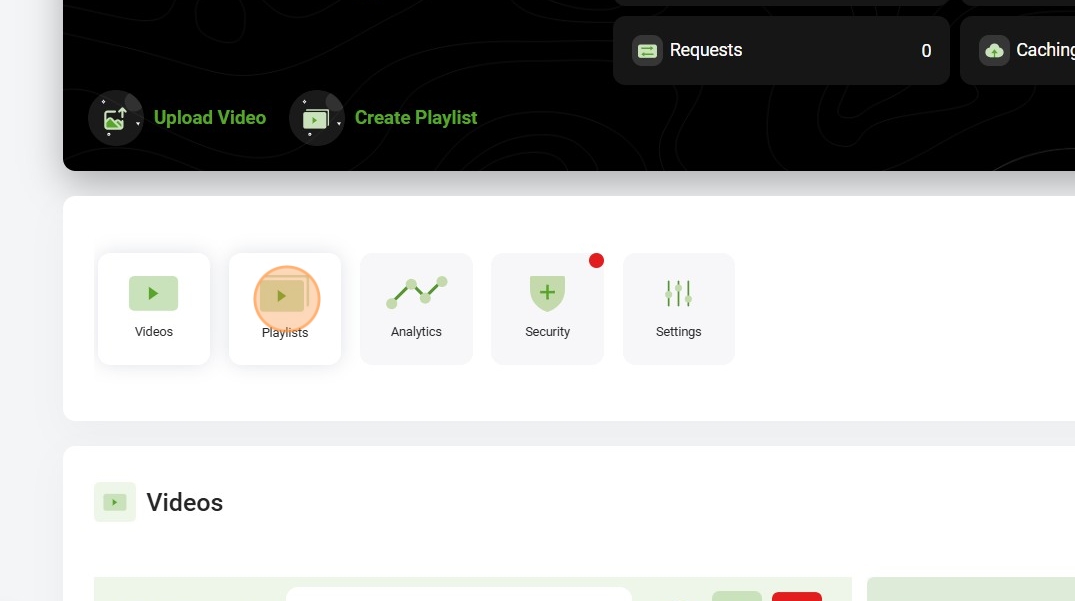
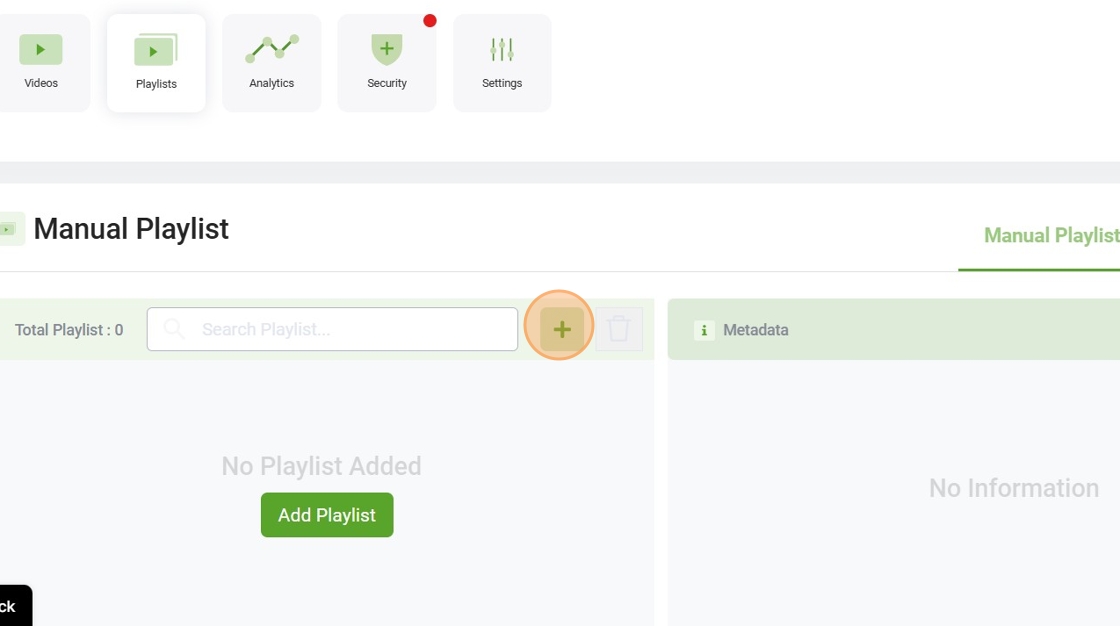
- Enter the Playlist Name, choose the Playlist Type (Manual or Dynamic), and provide an optional Description.
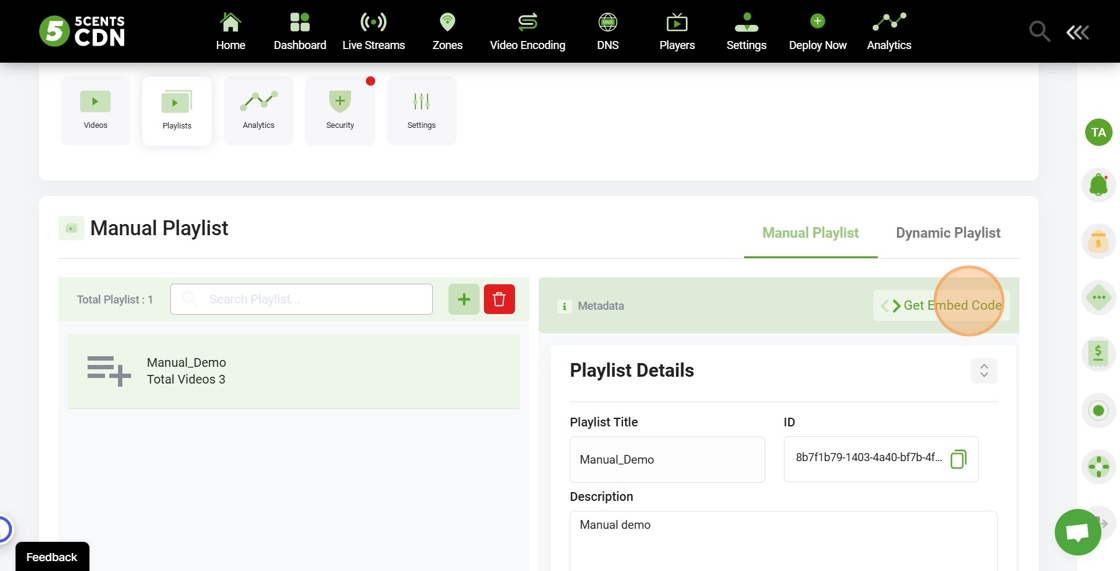
STEP 5: Embed code for your website
After creating a Manual or Dynamic playlist, you can easily copy the embed code from the 5centsCDN control panel and embed it on your website. Follow these steps to locate the embed code:
- Go to the PLAYLIST section.
- Select either Manual or Dynamic playlists.
- On the right side, find and click the Playlist Name.
- On the left, you’ll see the option GET EMBED CODE.
- A new window will appear, showing a preview of the playlist and the iframe code.
- Copy the iframe code and embed it on your website.
